
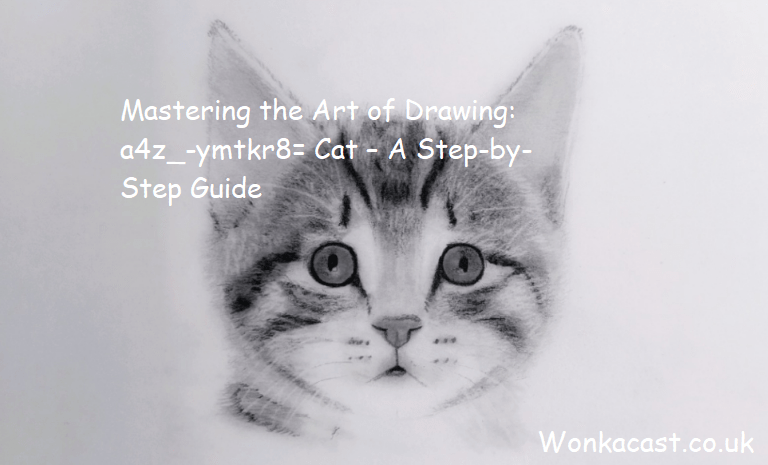
Introduction
Drawing is a powerful form of expression that allows individuals to communicate their thoughts, ideas, and emotions visually. For many, the challenge of capturing the likeness of a beloved pet, such as a cat, can be particularly rewarding. In this comprehensive guide, we will explore the intricacies of drawing a cat using the unique technique represented by “drawing:a4z_-ymtkr8= cat.” Whether you are a novice artist looking to enhance your skills or an experienced illustrator seeking new inspiration, this step-by-step guide will help you master the art of drawing cats with confidence.
Understanding the Basics of Drawing Cats
Before we dive into the specifics of the “drawing:a4z_-ymtkr8= cat” technique, it’s essential to grasp some fundamental drawing concepts that will serve as a foundation for your artwork.
1. The Importance of Observation
When drawing cats, or any subject, careful observation is crucial. Spend time watching real cats or studying photographs to understand their anatomy, movements, and expressions. Notice the way their bodies are structured, the shape of their heads, and the uniqueness of their features. This knowledge will help you create a more accurate representation.
2. Tools and Materials
Before you start, gather the necessary tools and materials. Here’s a basic list:
- Pencil: A range of pencils (HB for outlines, 2B for shading) will help you achieve various effects.
- Paper: Use quality drawing paper for better results. Smooth paper is great for detailed work, while textured paper can add character.
- Eraser: A kneaded eraser is ideal for gentle corrections without damaging the paper.
- Blending Tools: Blending stumps or cotton swabs can help smooth out your shading.
3. Warm-Up Exercises
To loosen your hand and improve your drawing skills, start with warm-up exercises. Practice drawing simple shapes and lines, and then move on to basic forms like spheres and cylinders. These exercises will prepare you for more complex shapes, such as a cat’s body.
Step-by-Step Guide to Drawing: a4z_-ymtkr8= Cat
Now that you are familiar with the basics, let’s delve into the “drawing:a4z_-ymtkr8= cat” technique. This section will break down the drawing process into manageable steps, ensuring you can follow along easily.
Step 1: Sketching the Basic Shapes
Begin by lightly sketching the basic shapes that will form the cat’s body. Use simple circles and ovals to outline the head, body, and legs. This is just a framework, so don’t worry about details at this stage.
- Head: Draw a circle for the head.
- Body: Use an oval shape for the body, positioned slightly below the head.
- Legs: Sketch elongated rectangles for the legs extending from the body.
Step 2: Defining the Facial Features
Once you have the basic shapes, it’s time to add defining features to your cat. Focus on the eyes, nose, and ears.
- Eyes: Draw two almond shapes within the head circle. Cats have expressive eyes, so feel free to add a glint by leaving a small white spot.
- Nose: Create a small triangle shape in the center below the eyes.
- Ears: Add two triangular shapes on top of the head for the ears. Cats’ ears are often pointed, so make sure to capture that characteristic.
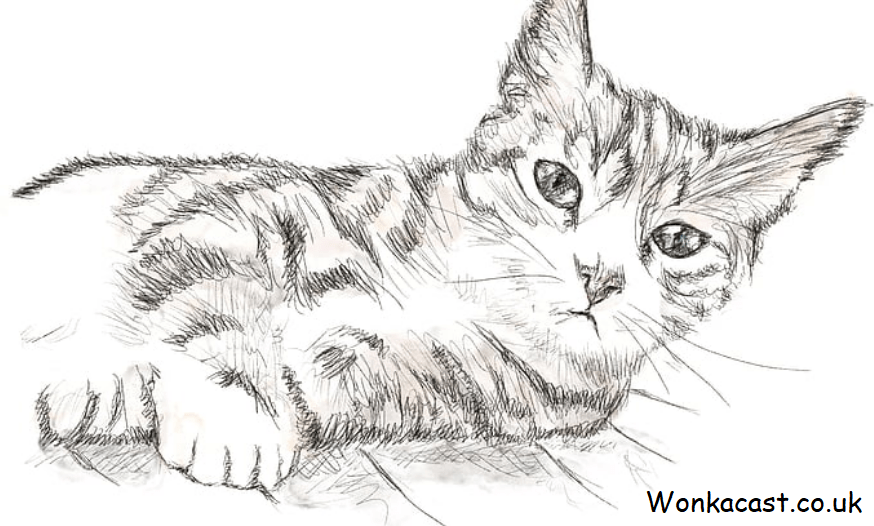
Step 3: Outlining the Body
Now, it’s time to refine the outline of the cat’s body. Smooth out the lines and ensure the proportions look right.
- Curves: Use gentle curves to connect the head and body, making sure it appears natural.
- Tail: Add a long, flowing line for the tail, which should taper to a point.
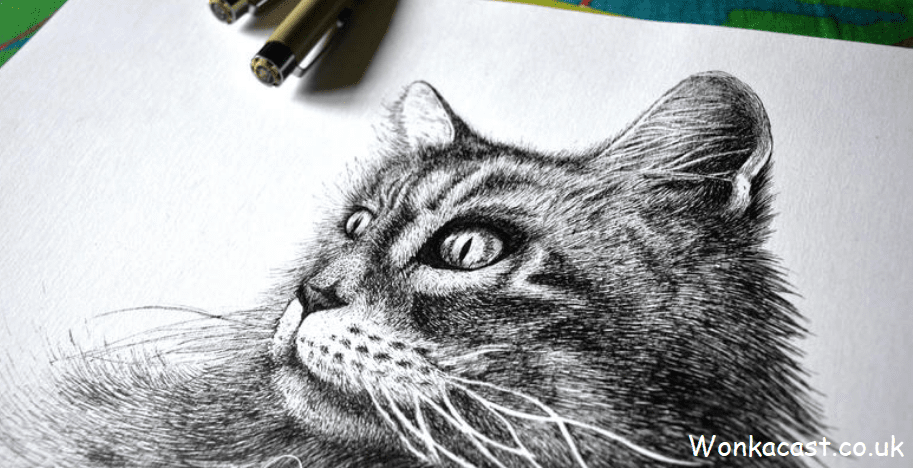
Step 4: Adding Details
With the main outline complete, you can now focus on adding details that will bring your cat to life.
- Fur Texture: Use short, quick strokes to represent fur. Remember that different parts of the body have varying fur lengths and textures, so adjust accordingly.
- Whiskers: Draw long, curved lines for the whiskers extending from the nose area.
Step 5: Shading and Depth
Shading is crucial for giving your drawing depth and dimension. Here’s how to approach it:
- Light Source: Decide where the light is coming from. This will guide your shading. Areas opposite the light source will be darker.
- Gradation: Use your blending tools to create a smooth transition between light and dark areas. The underbelly of the cat and the areas behind the ears will generally be darker.
Step 6: Final Touches
Once you’re satisfied with the shading and details, take a step back and assess your drawing. Make any final adjustments to ensure everything looks balanced.
- Contrast: Increase contrast where necessary by deepening some shadows.
- Highlights: Use an eraser to create highlights in the eyes and on the fur.
Practicing Different Cat Poses
To become proficient in drawing cats, practice various poses. Cats are known for their agility and grace, so capturing them in different stances will improve your skills. Start with simple sitting or lying positions before advancing to more dynamic poses, such as jumping or stretching. Sketching from photographs or live references can help you understand how a cat’s body moves and flexes, contributing to more realistic representations.
Exploring Different Breeds
Cats come in various breeds, each with distinct physical features. Explore drawing different breeds, such as Persians, Siamese, or Maine Coons, to expand your artistic repertoire. Each breed has unique traits, such as fur length, ear shape, and facial structure. By focusing on different breeds, you will not only diversify your skills but also gain a deeper understanding of feline anatomy, which will enhance your overall drawing technique.
Incorporating Background Elements
To create a more engaging drawing, consider adding background elements that complement your cat. Whether it’s a cozy room, a garden, or an outdoor setting, background elements can enhance the storytelling aspect of your artwork. Simple outlines of furniture, plants, or other animals can provide context. Ensure that the background does not overpower your cat; it should enhance the composition and draw attention to the main subject.
Developing Your Unique Style
As you grow more comfortable with drawing cats, begin to develop your unique artistic style. This could involve experimenting with different techniques, color palettes, or even abstract interpretations of cats. Allow yourself to play with styles, such as realism, cartoon, or impressionism. Developing a unique voice in your art will not only make your drawings more personal but also set your work apart in the vast world of feline artistry.
Joining a Community
Consider joining an art community or online group where fellow cat lovers share their artwork and tips. Engaging with a community can provide valuable feedback on your work and inspire new ideas. Platforms like social media, art forums, and local art classes can offer support and encouragement. Sharing your progress and challenges with others fosters a sense of belonging and motivates you to continue honing your skills in drawing cats.
Conclusion
Mastering the art of drawing a cat through the “drawing:a4z_-ymtkr8= cat” technique requires patience and practice. By following this step-by-step guide, you will be able to create lifelike representations of cats that capture their unique personalities. Remember that every artist has their own style, so don’t be afraid to experiment and make the drawing your own.
As you continue to practice, you will not only improve your drawing skills but also develop a deeper appreciation for the beauty of cats. Whether you’re creating artwork for personal enjoyment or sharing your skills with others, the joy of drawing cats is a fulfilling journey worth taking.
Now grab your pencils and paper, and let’s bring those adorable felines to life!
FAQs
1. What materials do I need for drawing cats?
You will need pencils, quality drawing paper, an eraser, and blending tools.
2. How can I improve my cat drawing skills?
Practice regularly, observe real cats, and experiment with different techniques.
3. What is the best way to shade a cat drawing?
Determine your light source and use a blending tool for smooth transitions.
4. Can I use references for drawing cats?
Absolutely! Using photos or real cats as references can enhance your accuracy.
5. Is it necessary to follow the steps precisely?
No, these steps serve as a guideline. Feel free to adapt them to suit your style.